Attendees' data to collect
Overview
When attendees purchase tickets for your event, alf.io collects basic information by default: First Name, Last Name, Email Address, and Language preference. However, you may need to collect additional information such as company name, phone number, dietary preferences, or any other custom data relevant to your event.
The Attendees’ data to collect feature allows you to define custom fields that will be displayed in the registration form. These fields can be configured to:
- Use pre-defined templates for common data types
- Create fully custom fields with various input types
- Control visibility based on ticket categories
- Display information during check-in

Accessing the Configuration
- Navigate to your event’s detail page in the admin panel
- In the left sidebar under Details, click on Attendees’ data to collect
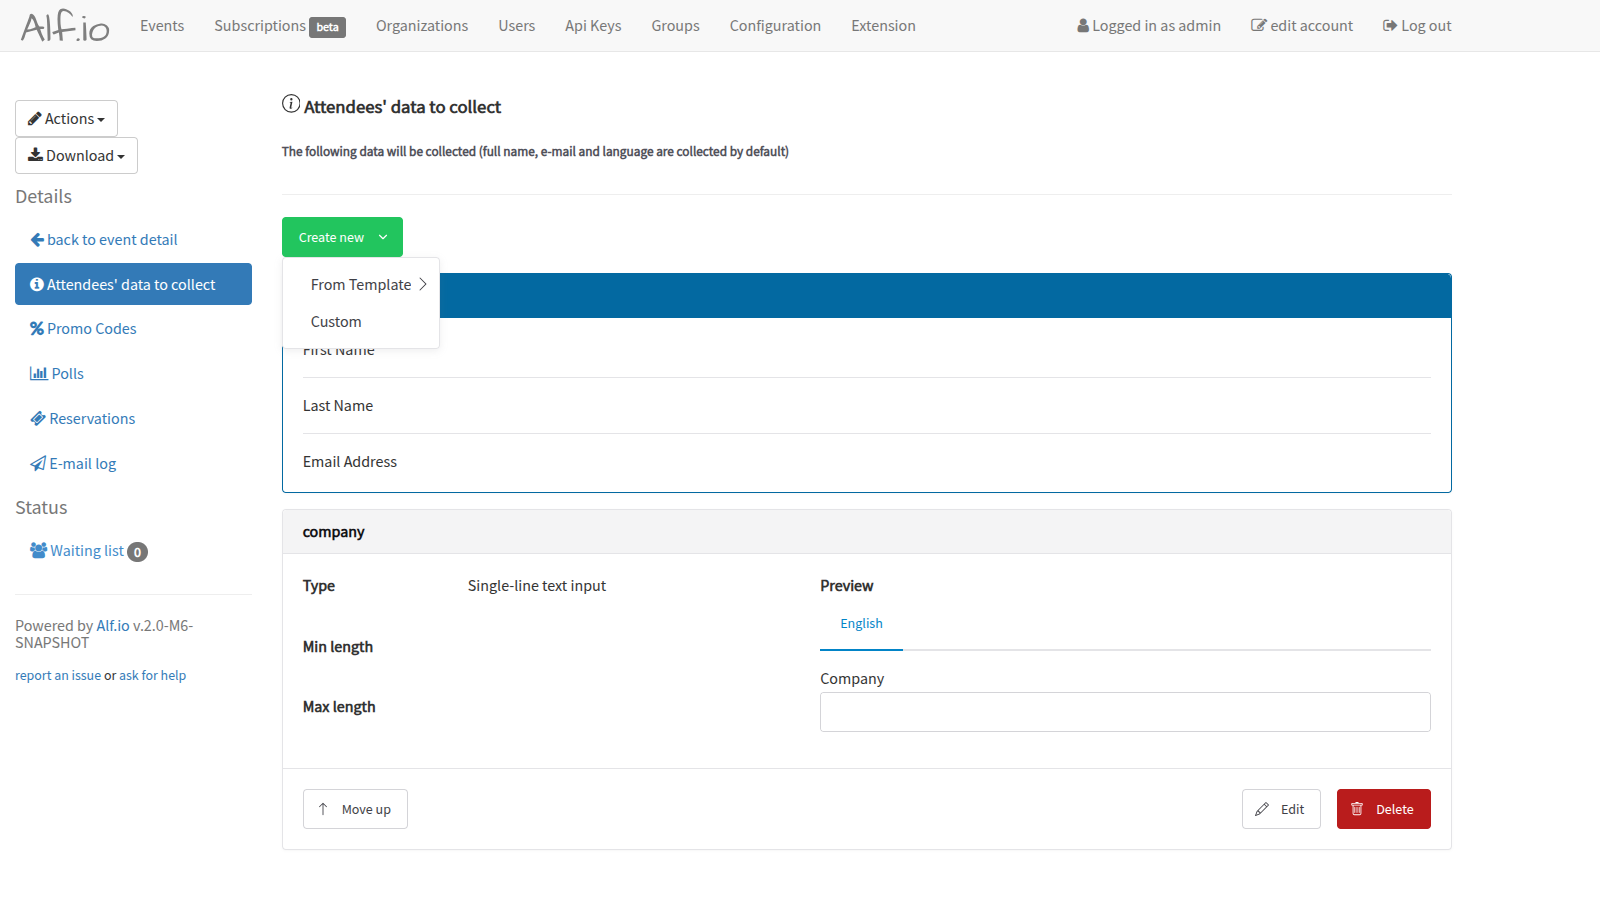
You will see: - Standard Fields: The default fields (First Name, Last Name, Email Address) that are always collected - Custom Fields: Any additional fields you have configured
Adding New Fields
Click the Create new button to add a new field. You have two options:
Using Templates
Select From Template to choose from pre-configured field types:
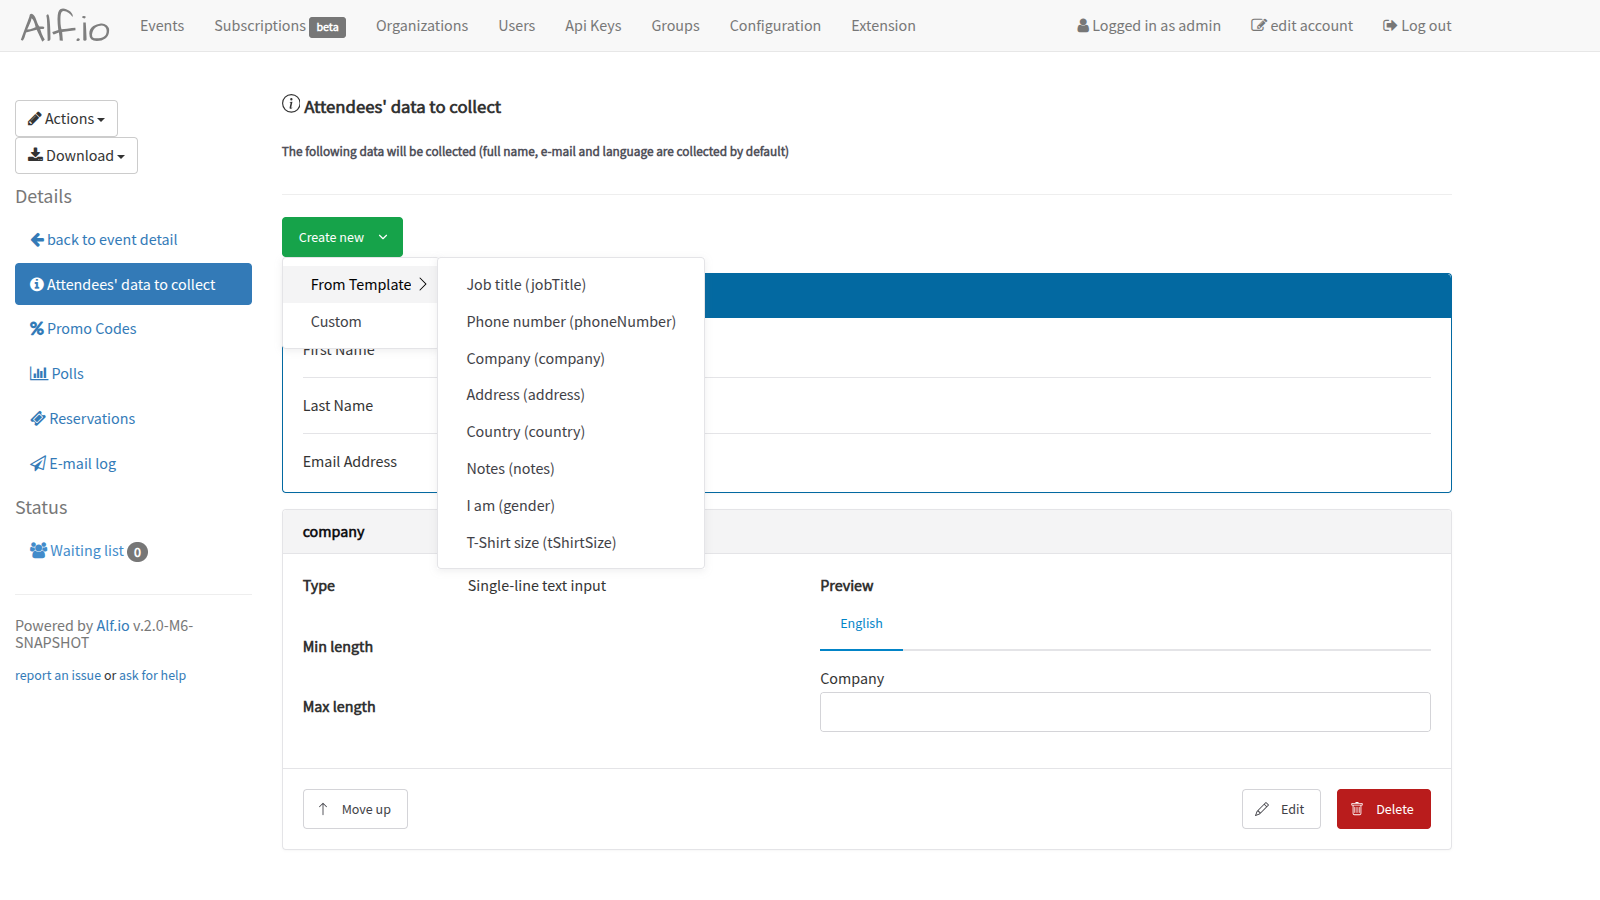
Available templates include:
- Job title - Single-line text for professional title
- Phone number - Validated phone number input
- Company - Single-line text for organization name
- Address - Multi-line text for postal address
- Country - Drop-down selection of countries
- Notes - Multi-line text for additional comments
- I am (gender) - Radio button selection
- T-Shirt size - Drop-down selection for merchandise sizing
Templates come pre-configured with appropriate field types and labels, saving you time on common data collection needs.
Creating Custom Fields
Select Custom to create a field from scratch with full control over all settings.
Field Configuration
When adding or editing a field, you’ll see the configuration dialog:
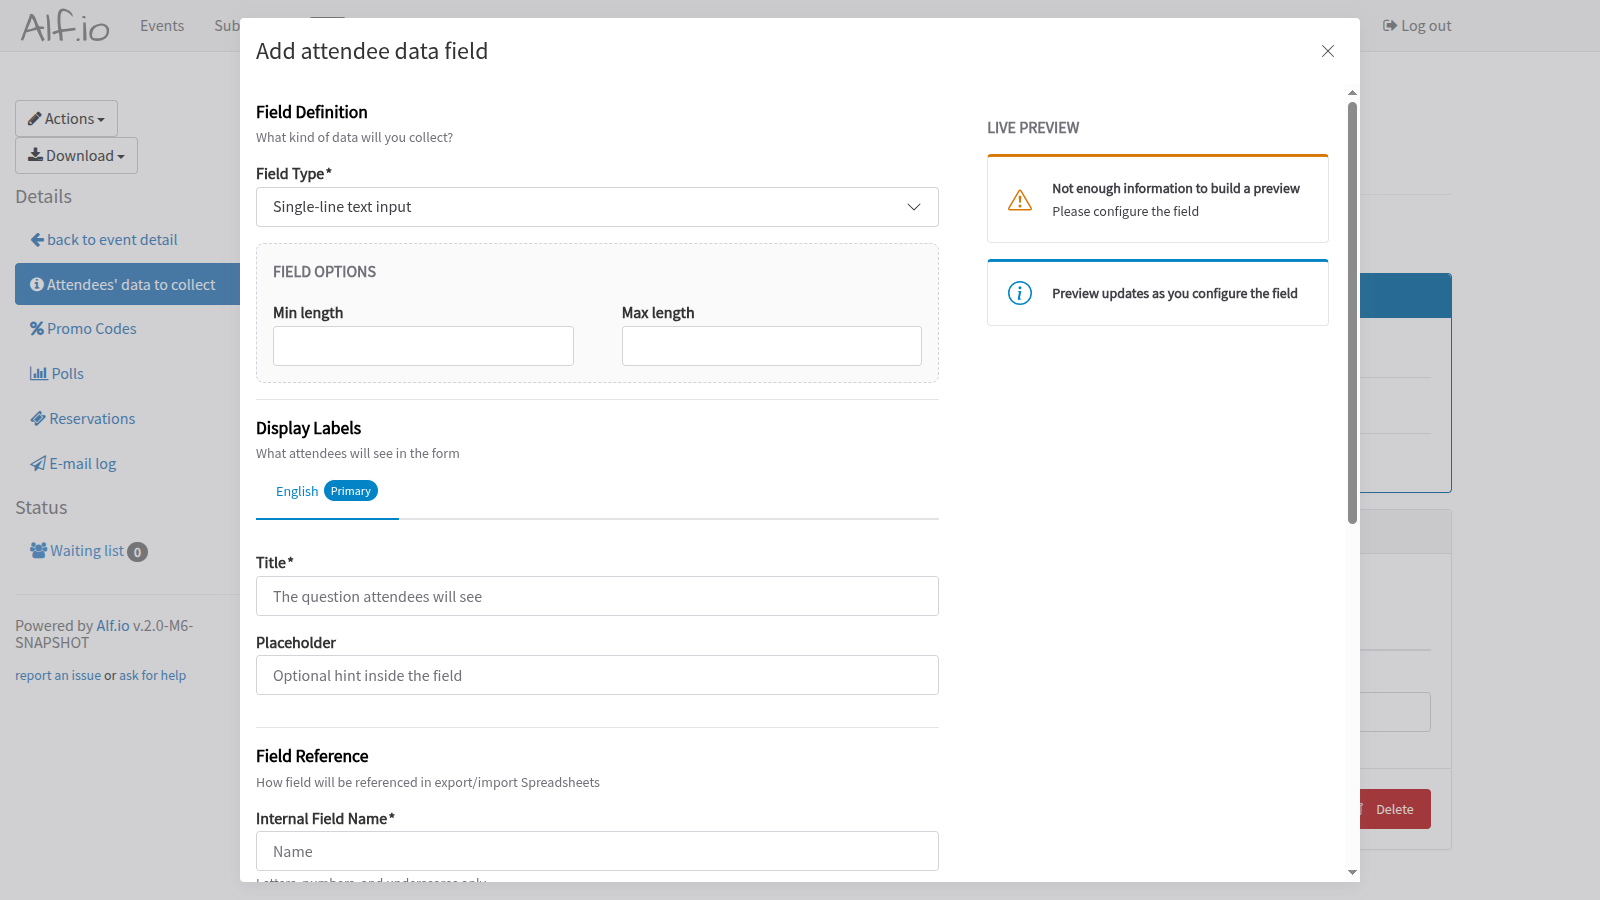
Field Definition
Field Type determines how the data is collected. Available types are:
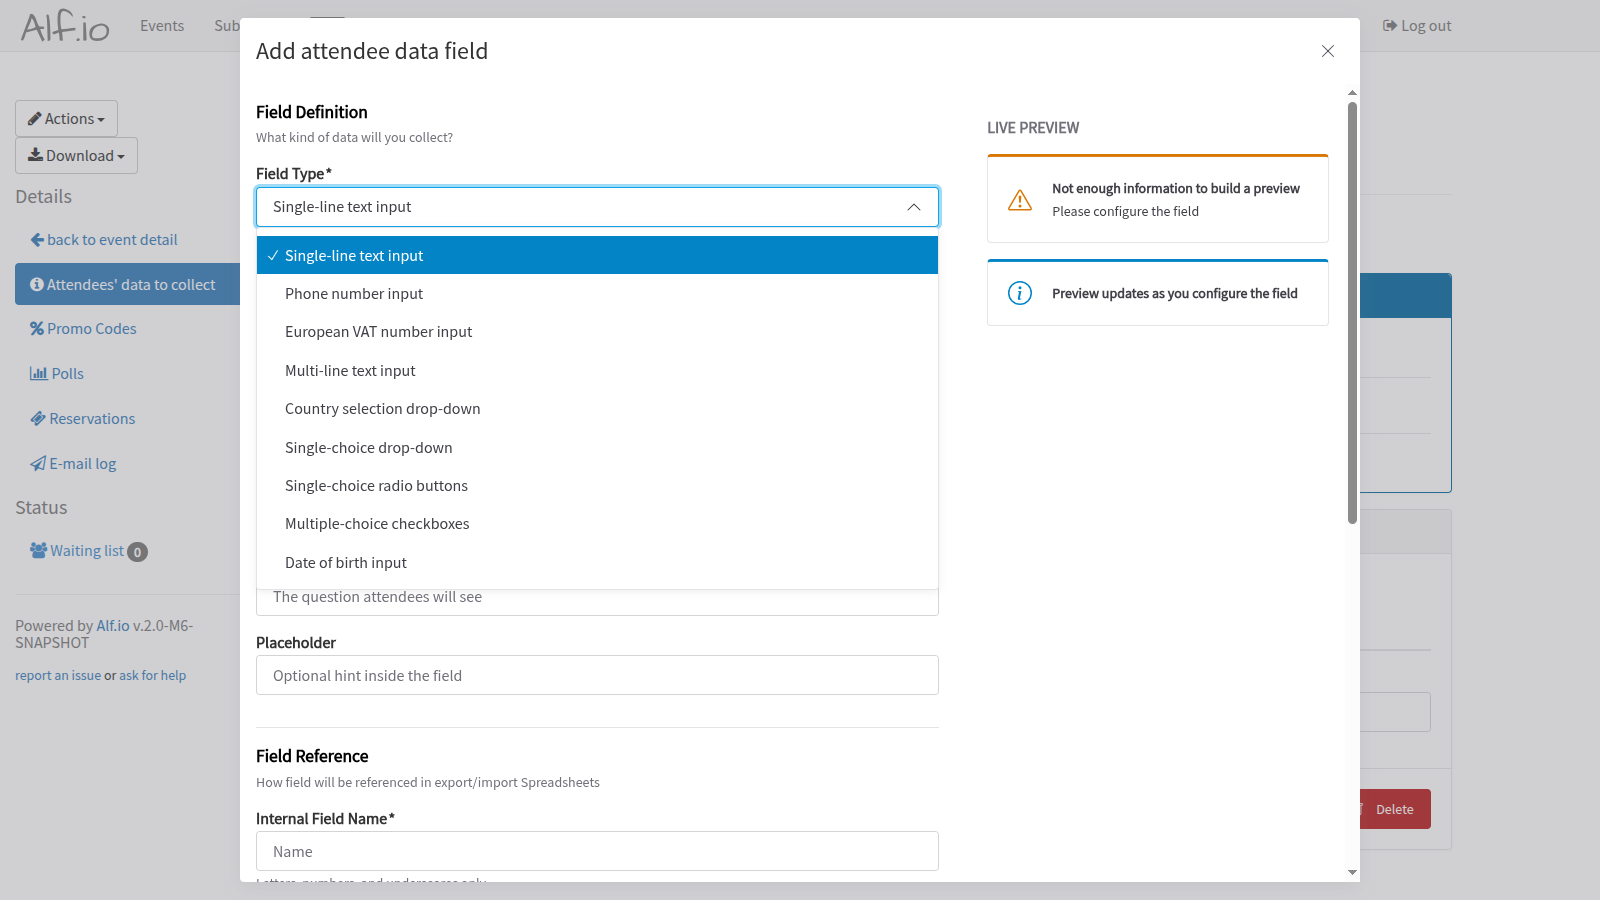
| Field Type | Description | Best Used For |
|---|---|---|
| Single-line text input | Standard text field | Names, titles, short answers |
| Phone number input | Validated phone format | Contact numbers |
| European VAT number input | VAT validation | Business invoicing |
| Multi-line text input | Text area for longer content | Addresses, notes, comments |
| Country selection drop-down | Pre-populated country list | Geographic information |
| Single-choice drop-down | Select one option from list | Categories, sizes, preferences |
| Single-choice radio buttons | Visible options, select one | Gender, yes/no questions |
| Multiple-choice checkboxes | Select multiple options | Interests, dietary restrictions |
| Date of birth input | Date picker | Age verification, birthday |
Field Options vary by field type:
- For text inputs: Set minimum and maximum character lengths
- For choice fields: Define the available options
Display Labels
Configure what attendees see in the form:
- Title: The question or label displayed above the field (required)
- Placeholder: Optional hint text shown inside empty fields
If your event supports multiple languages, you can provide translations for each language by switching tabs.
Field Reference
The Internal Field Name is used to identify the field in:
- Data exports (CSV, Excel)
- Data imports
- API integrations
- Check-in application
Use only letters, numbers, and underscores (e.g., company_name, dietary_preference).
Field Behavior
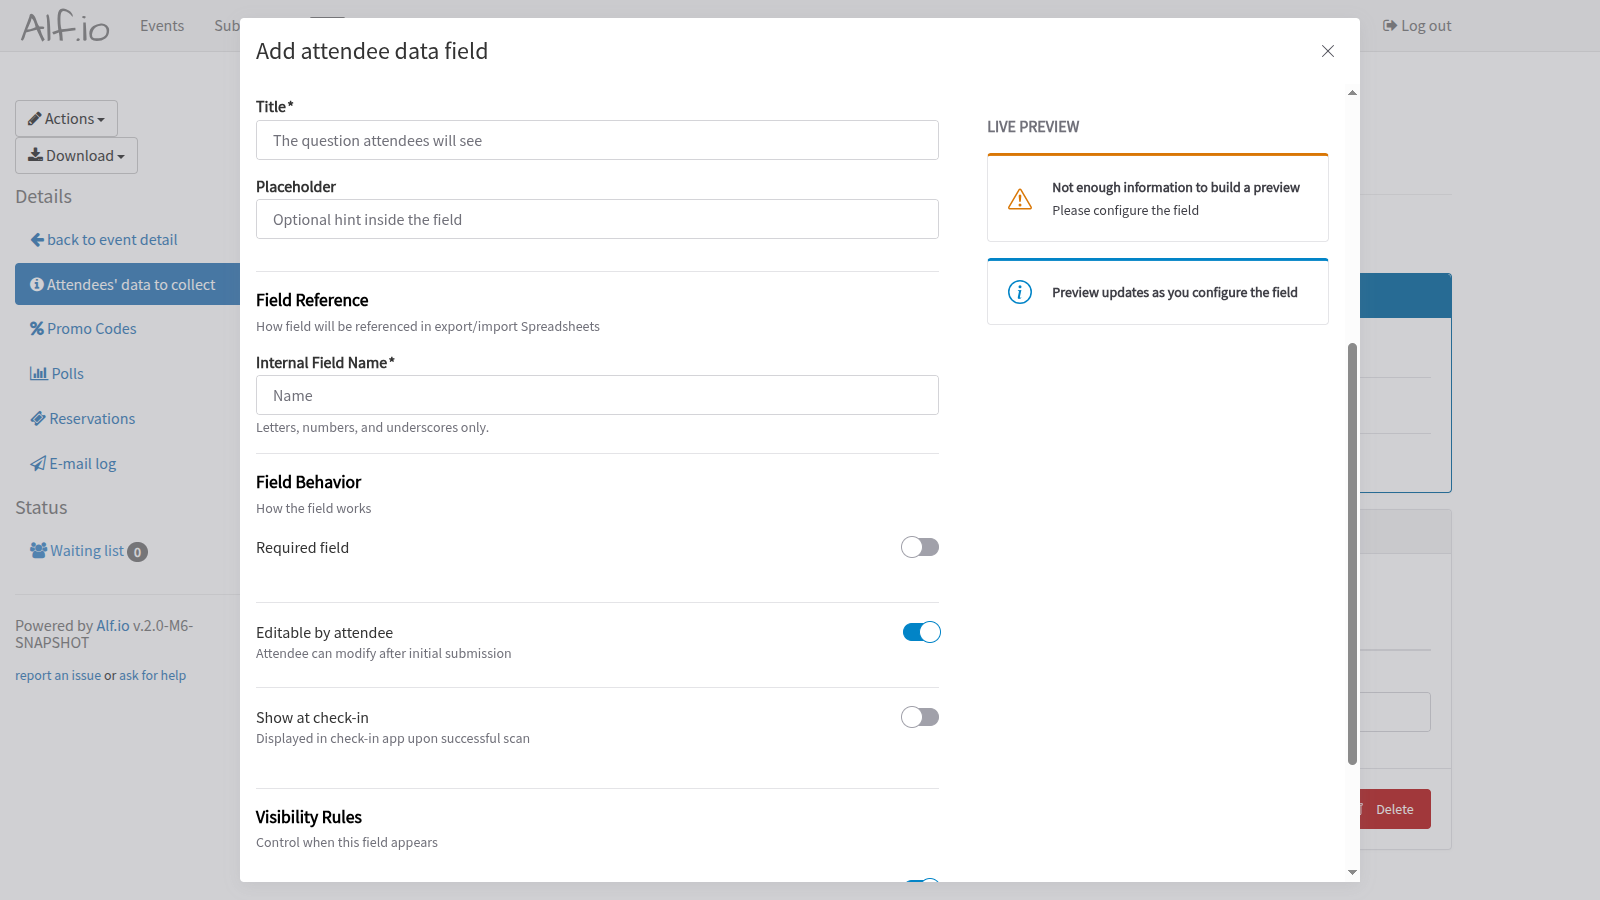
Configure how the field behaves:
| Option | Description |
|---|---|
| Required field | Attendees must fill this field to complete registration |
| Editable by attendee | Attendees can modify this field after initial submission (via their ticket management page) |
| Show at check-in | Field value is displayed in the check-in app when scanning the attendee’s ticket |
Visibility Rules
Control when this field appears:
- Apply to all ticket categories: The field appears for all ticket types
- Select specific categories: The field only appears for selected ticket categories
This is useful when certain information is only needed for specific ticket types (e.g., workshop preferences only for workshop tickets).
Managing Existing Fields
After adding fields, they appear in the configuration page:
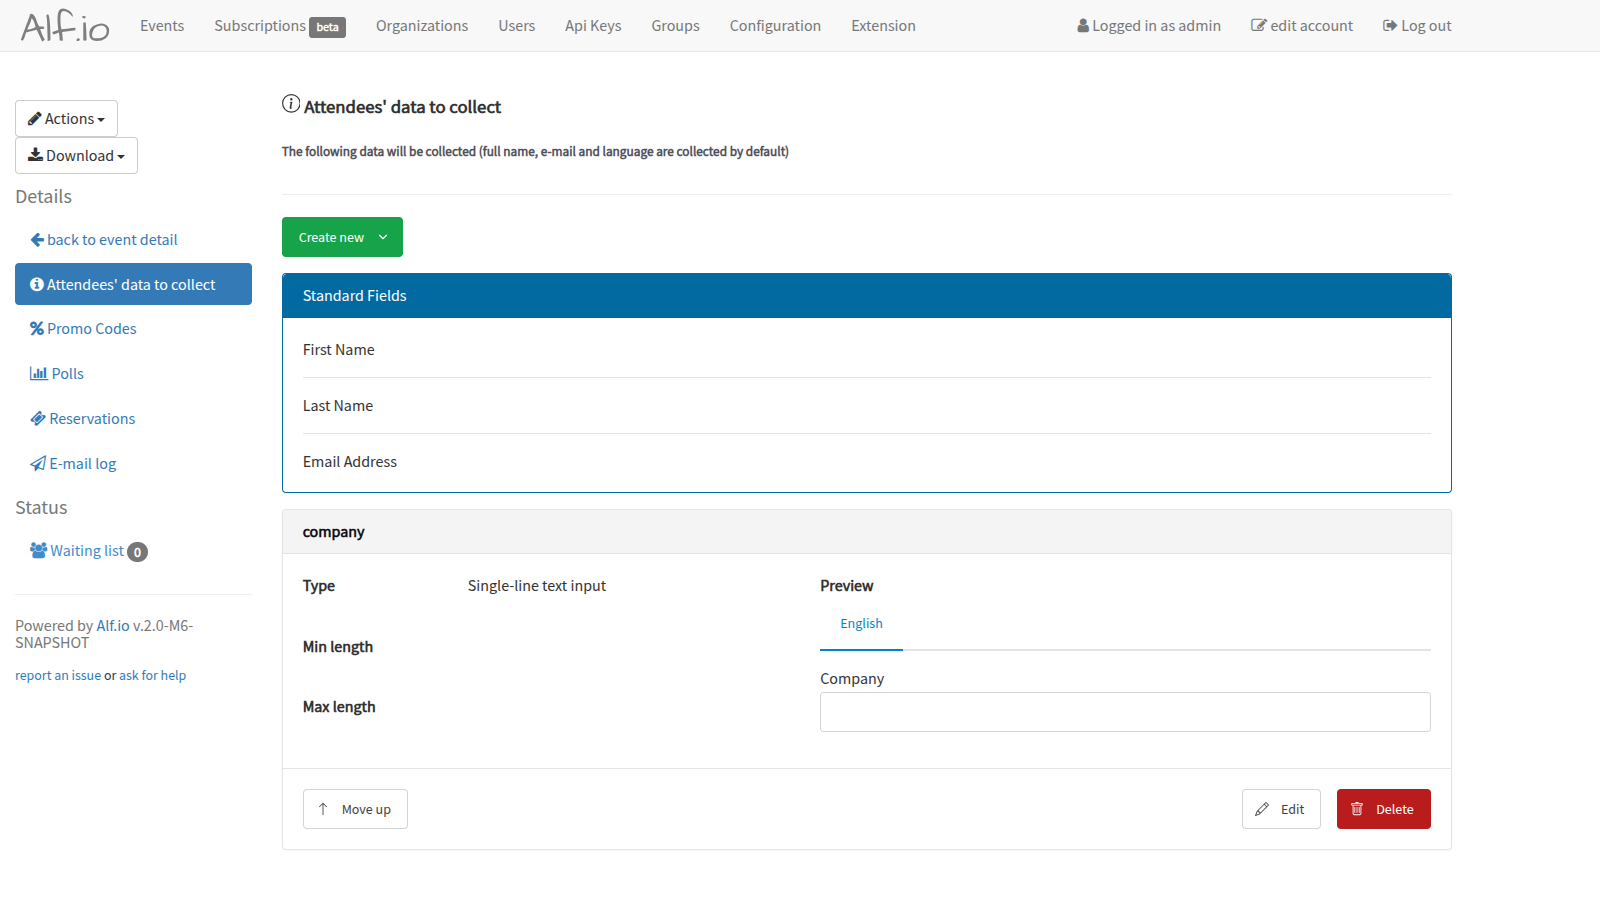
For each custom field, you can:
- Move up: Change the display order (fields are shown top-to-bottom)
- Edit: Modify the field configuration
- Delete: Remove the field (data from existing registrations is preserved)
Best Practices
- Keep it minimal: Only collect data you actually need. Shorter forms lead to better conversion rates.
- Mark appropriately as required: Only mark fields as required if the information is truly essential.
- Use templates when possible: Templates are pre-configured with appropriate validation and formatting.
- Consider privacy: Be mindful of collecting sensitive information. Include appropriate privacy notices in your event terms.
- Test your form: After configuration, go through the ticket purchase flow to verify fields appear correctly.
- Enable check-in display wisely: Only show fields at check-in that help staff (e.g., VIP status, dietary needs for catering).
Data Access
Collected attendee data can be accessed through:
- Reservations list: View individual attendee details
- Export functionality: Download all data in CSV or Excel format
- Check-in app: View configured fields during attendee check-in
- API: Programmatic access for integrations